

Controlling battles in Dragonheir: Silent Gods requires balancing automated standard attacks with manual intervention for Ultimate Skills, team positioning, and Mastery triggers. Basic attacks trigger automatically against assigned targets, but survival in difficult encounters hinges on manually selecting targets and timing ultimate casts. You can toggle manual control at any time using the Auto icon directly above the 2x Speed button, while managing defensive windows through saved team delay profiles.
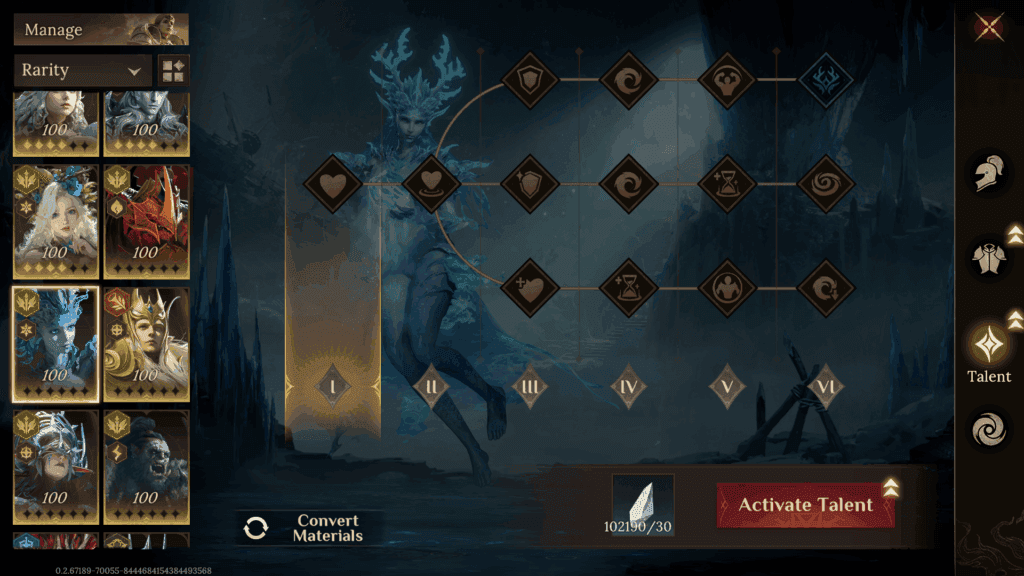
Core Battle Interface and Manual Skill Targeting
Combat execution centers on manual ultimate skill deployment. While normal attacks cycle automatically, manual control dictates when each hero's Ultimate Skill fires and where its targeted area lands on the field according to HellHades' combat guide.
To manage casts without misclicks, track hero readiness using two interface elements: * Health bar energy gauges: A meter below each character's overhead health bar displays current charge progress. * Bottom-right hero cards: Ally energy readiness also displays in the bottom-right corner of the combat display, allowing you to select and aim skills across crowded boards.
Automated combat handles skills via the Auto Spellcasting toggle, positioned directly above the 2x Speed button. In standard Auto mode, heroes fire their ultimate abilities the instant their energy gauges fill. While convenient for trivial farming stages, leaving Auto enabled during progression stages causes heroes to waste burst damage on low-health minions or trigger defensive shields when no boss attack is incoming.

70 Dragon Crystals
 70 Dragon CrystalsUSD 0.64Buy Now
Celebration Value Pack
Celebration Value PackUSD 0.62Buy NowSeason Summons Pack I
Season Summons Pack IUSD 0.64Buy NowLegendary Hero Special Pack (S1-S5)
Legendary Hero Special Pack (S1-S5)USD 3.81Buy Now350 Dragon Crystals
350 Dragon CrystalsUSD 3.90Buy NowApprentice's Secret Collection
Apprentice's Secret CollectionUSD 3.90Buy NowMonthly Apprentice Gift
Monthly Apprentice GiftUSD 3.90Buy NowSeason Summons Pack II
Season Summons Pack IIUSD 3.90Buy NowVow of Companionship
Vow of CompanionshipUSD 3.90Buy NowWyrmarrow Mining Warrant
Wyrmarrow Mining WarrantUSD 3.90Buy Now700 Dragon Crystals
700 Dragon CrystalsUSD 6.50Buy NowHero's Anthem
Hero's AnthemUSD 6.50Buy NowMonthly Master Gift
Monthly Master GiftUSD 6.50Buy NowMonthly Scholar Gift
Monthly Scholar GiftUSD 6.50Buy NowMonthly Summons Pack I
Monthly Summons Pack IUSD 6.50Buy NowWeekly Apprentice Gift
Weekly Apprentice GiftUSD 6.50Buy NowDaily Supply from Three Ears
Daily Supply from Three EarsUSD 6.51Buy Now7-Day Daily Value Pack
7-Day Daily Value PackUSD 6.50Buy NowSeason Summons Pack III
Season Summons Pack IIIUSD 6.50Buy NowWalker's Selection
Walker's SelectionUSD 6.50Buy NowCrucial Horn
Crucial HornUSD 10.33Buy NowInferno Shadows
Inferno ShadowsUSD 10.18Buy NowCrystal Echoes
Crystal EchoesUSD 10.18Buy NowScholar's Secret Collection
Scholar's Secret CollectionUSD 10.33Buy NowSnowland Lament
Snowland LamentUSD 10.33Buy Now1,400 Dragon Crystals
1,400 Dragon CrystalsUSD 13.04Buy NowSynarell Exclusive Skin Pack
Synarell Exclusive Skin PackUSD 12.72Buy NowWhirling Shadows
Whirling ShadowsUSD 13.12Buy NowMonthly Summons Pack II
Monthly Summons Pack IIUSD 13.04Buy NowWeekly Scholar Gift
Weekly Scholar GiftUSD 13.04Buy NowWeekly Summons Pack I
Weekly Summons Pack IUSD 13.04Buy NowFey's Gift
Fey's GiftUSD 13.04Buy NowFrostlands Whisper
Frostlands WhisperUSD 12.72Buy NowImperial Shadow
Imperial ShadowUSD 13.04Buy NowLunar Halo Radiance
Lunar Halo RadianceUSD 12.72Buy NowSeason Summons Pack IV
Season Summons Pack IVUSD 13.04Buy NowWeekly Master Gift I
Weekly Master Gift IUSD 13.04Buy Now3,500 Dragon Crystals
3,500 Dragon CrystalsUSD 32.41Buy NowCelebration Luxury Secret Collection
Celebration Luxury Secret CollectionUSD 31.71Buy NowMaster's Secret Collection
Master's Secret CollectionUSD 32.41Buy NowMonthly Summons Pack III
Monthly Summons Pack IIIUSD 32.41Buy NowSeason Summons Pack V
Season Summons Pack VUSD 32.41Buy NowWeekly Master Gift II
Weekly Master Gift IIUSD 32.41Buy NowWeekly Summons Pack II
Weekly Summons Pack IIUSD 32.41Buy NowLegendary Damage Dealer Option Pack (S1-S5)
Legendary Damage Dealer Option Pack (S1-S5)USD 63.55Buy NowLegendary Support Option Pack (S1)
Legendary Support Option Pack (S1)USD 63.55Buy Now7,000 Dragon Crystals
7,000 Dragon CrystalsUSD 65.15Buy NowCelebration Premium Secret Collection
Celebration Premium Secret CollectionUSD 63.55Buy NowCelebration Premium Summons Pack
Celebration Premium Summons PackUSD 63.55Buy NowMonthly Summons Pack IV
Monthly Summons Pack IVUSD 65.15Buy NowWeekly Summons Pack III
Weekly Summons Pack IIIUSD 65.15Buy NowSeason Summons Pack VI
Season Summons Pack VIUSD 65.15Buy NowWeekly Master Gift III
Weekly Master Gift IIIUSD 65.15Buy Now14,000 Dragon Crystals
14,000 Dragon CrystalsUSD 130.43Buy Now
Pre-Battle Positioning on the 5x8 Grid
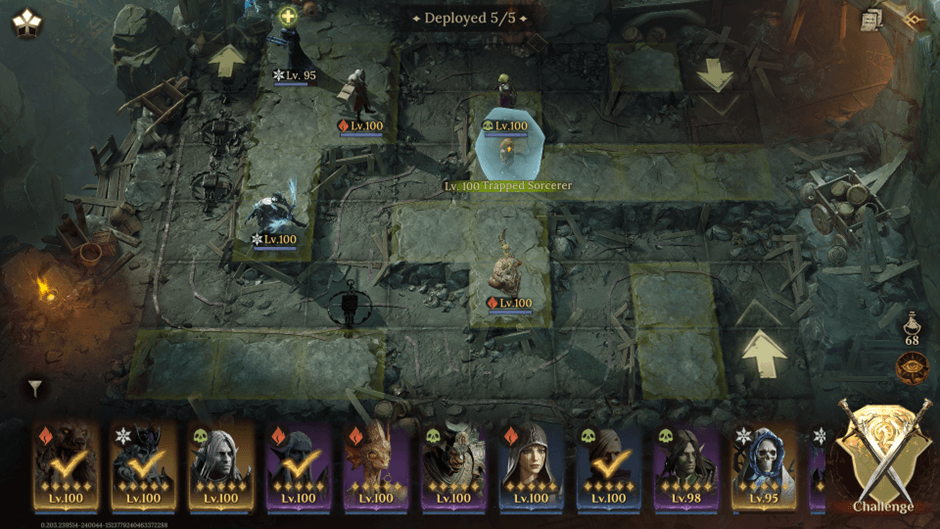
Initial deployment on the 5x8 grid sets target acquisition lines and spatial coverage before any hero takes an action.
Before locking in hero tiles, inspect the encounter parameters: 1. Click the Info icon in the top-left corner of the screen, situated directly next to the Exit button. 2. Review enemy skill descriptions, aggro targeting behaviors, and Resistance ratings. 3. Adjust front-line and back-line heroes to keep fragile damage dealers outside cleave and aggro lines.
Targeting indicator lines preview unit locks before combat begins, though community guides report conflicting color schemes. BlueStacks documents that an ally targeting an enemy draws a red line, while targeting an ally creates a yellow line. In contrast, HellHades records friendly targeting paths as yellow lines, enemy paths as red lines, and mutual targeting as purple lines. Verify each unit's highlighted target reticle before starting rather than relying solely on the line color.
Custom Skill Timings vs. Manual Triggering
Support heroes bring shields, immunities, and burst healing that must hit specific timing windows. Every ultimate skill contains an Initial Charge Time and a Complete Recharge Time. If a support unit's cycle trails behind boss mechanics, defensive shields expire before the boss strikes, exposing the party according to HellHades' skill timing guide.
To automate farming runs without mistiming defensive cooldowns, configure hero delay timers: 1. Open your Saved Team setup menu. 2. Select Skill Timings for individual heroes. 3. Input specific second delays on ultimate casts rather than letting them fire immediately upon recharge. 4. Align support skill execution timers to land directly ahead of scheduled boss area-of-effect phases.
Tuning recharge gear loops may require stamina refreshes; players managing seasonal resources can purchase Dragon Crystals, which convert 1:1 into Wyrmarrow for stamina refills and summons or buy progression passes.
| Control Mode | Input Method | Best Use Case | Risk Factor |
|---|---|---|---|
| Full Manual | Tap/Click hero portrait in bottom right, drag targeting reticle | Progression stages, high-tier bosses, skill check encounters | Slower execution if inputs are delayed |
| Auto Spellcasting | Toggle Auto button above the 2x Speed button | Low-level resource farming and cleared dungeons | Skills fire immediately on recharge, wasting heals and shields |
| Saved Team Timings | Pre-set delay timers in team menu | Unattended boss farming runs requiring strict shield/heal windows | Requires recalculation if hero Haste or boss attack speed shifts |
Mastery Skill Deployment Rules
The Mastery Skill acts as a manual emergency button that bypasses normal automated combat mechanics.
- Interface location: The Mastery Skill button sits directly above the team card display in the bottom-right corner of the interface.
- Automation restrictions: The Mastery Skill will not cast automatically in any game mode, even with Auto Spellcasting enabled.
- Charge requirements: The gauge charges exclusively through enemy kills rather than over time.
- Skill effects: Activating the Mastery Skill delivers a full-board attack against all active enemies while granting your team a 10% Max HP shield lasting for 10 seconds per HellHades' combat analysis.
Save this trigger for phases where multiple minions spawn, refreshing the shield to absorb large party-wide burst damage.
Recommended Combat Control Routine
Execute encounters using this sequence to avoid wasted inputs:
- Inspect before battle: Open the top-left Info menu beside the Exit icon to check boss Resistance and attack patterns.
- Align grid lanes: Place tanks and supports on the 5x8 grid to intercept aggro paths.
- Disable Auto at start: Turn off the Auto icon above 2x Speed to retain manual control over Initial Charge ultimate casts.
- Monitor dual meters: Watch overhead energy bars and bottom-right portraits to queue manual targeted ultimates.
- Hold Mastery for boss bursts: Trigger the manual bottom-right Mastery icon when minion waves yield full charge, securing the 10-second shield for incoming boss attacks.



Comments