

Stop burning currency on soulshots and potions with the fastest Lineage2M Adena farm route, built to maximize your hourly solo profits across 2026.
Every mid-level Lineage2M player eventually hits the same wall. You queue auto-combat for four hours and return to find your character dead, your potion pouch empty, and your Adena balance depleted. Adena funds skill books, armor upgrades, material crafting, and the soulshots required to maintain clear speed.
If consumable burn outpaces monster loot turnover, account progression halts. Fixing your economy comes down to three factors: picking the right hunting zones, setting smart auto-combat thresholds, and running classes that do not bleed potions.
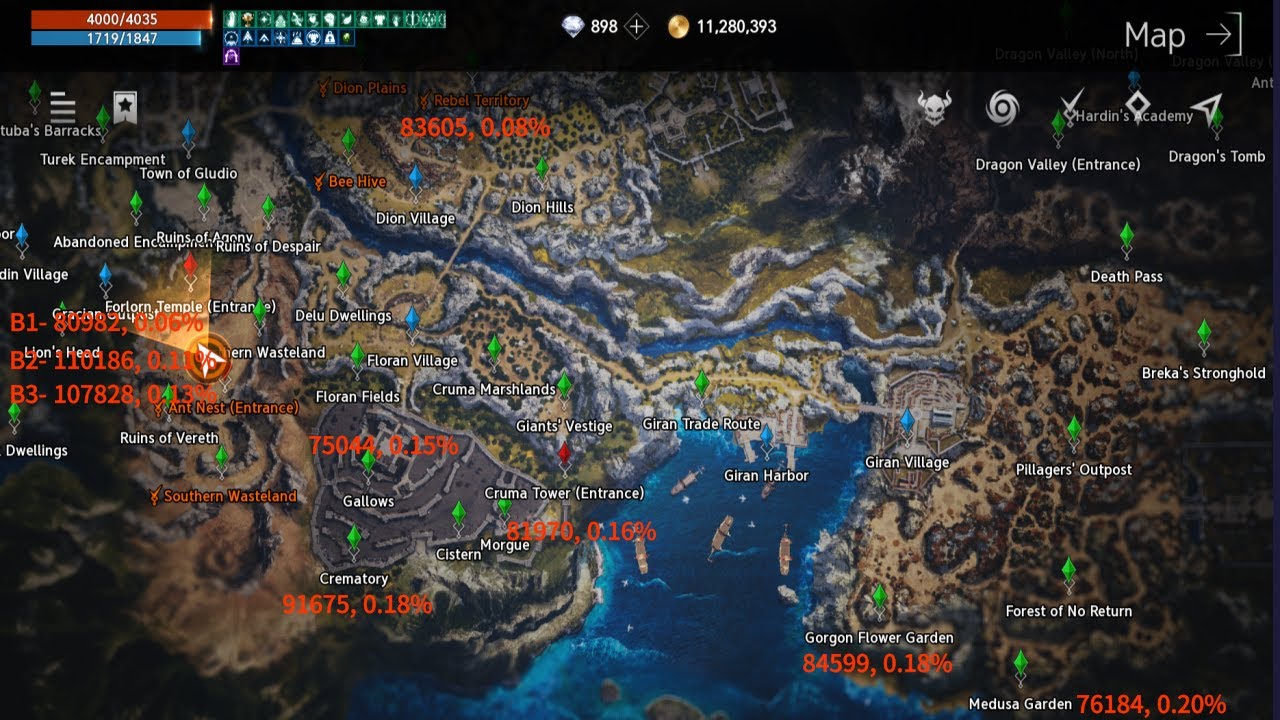
Why Most Solo Players Bleed Adena Every Hour
Chasing high-defense monsters drains red potions fast. If a mob drops 250 Adena but demands three potions and eight soulshots to kill, every encounter runs at a net loss.
Class selection sets your baseline operating cost. Dagger rogues offer burst PvP damage, but their lack of innate sustain makes solo auto-grinding expensive; they chain-chug potions just to stay alive against standard packs.
Orb builds flip this dynamic. Auto-casting the NPC-purchased Heal skill eliminates potion expenses entirely. For melee players, Dwarf Dual Sword characters gain sustain from an awakening passive that restores 2 HP per critical hit, offsetting chip damage in dense swarms.
Professions evolve at levels 5, 40, 65, and 80, granting stats and skills that lower kill times. If your build needs immediate resources for core books, Lineage2M top-ups on xptopup provide diamonds to clear early-game bottlenecks.

40 Diamonds
 40 DiamondsUSD 0.54Buy Now
Agathion Benefit I
Agathion Benefit IUSD 0.54Buy NowClass Benefit I
Class Benefit IUSD 0.54Buy NowErica's Class Key
Erica's Class KeyUSD 0.55Buy NowSoul Crystal Open Benefit
Soul Crystal Open BenefitUSD 0.54Buy NowDaily Agathion Pack I
Daily Agathion Pack IUSD 0.81Buy NowDaily Class Pack I
Daily Class Pack IUSD 0.81Buy NowAutumn Mount Key
Autumn Mount KeyUSD 1.09Buy NowIvory Tower Class Key
Ivory Tower Class KeyUSD 1.09Buy NowLate Summer Dungeon Key
Late Summer Dungeon KeyUSD 1.09Buy NowLate Summer Soul Crystal Key
Late Summer Soul Crystal KeyUSD 1.09Buy NowLeah Autumn Dungeon Key
Leah Autumn Dungeon KeyUSD 1.09Buy Now180th Day Celebration Key I
180th Day Celebration Key IUSD 1.09Buy Now100 Diamonds
100 DiamondsUSD 1.33Buy NowAdena Blessing
Adena BlessingUSD 1.33Buy NowAgathion Benefit II
Agathion Benefit IIUSD 1.33Buy NowBlessing Benefit I
Blessing Benefit IUSD 1.35Buy NowB1G1 Greater Agathion Card
B1G1 Greater Agathion CardUSD 1.35Buy NowB1G1 Greater Class Card
B1G1 Greater Class CardUSD 1.35Buy NowClass Benefit II
Class Benefit IIUSD 1.33Buy NowMount Open Benefit
Mount Open BenefitUSD 1.33Buy NowSoul Crystal Agathion Benefit
Soul Crystal Agathion BenefitUSD 1.33Buy NowSoul Crystal Class Benefit
Soul Crystal Class BenefitUSD 1.36Buy Now120 Diamonds
120 DiamondsUSD 1.60Buy Now200 Diamonds
200 DiamondsUSD 2.66Buy NowAgathion Benefit III
Agathion Benefit IIIUSD 2.66Buy NowAria / Erica Celebration Pack
Aria / Erica Celebration PackUSD 2.70Buy NowAutumn Soul Crystal Key
Autumn Soul Crystal KeyUSD 2.70Buy NowBlessing Benefit II
Blessing Benefit IIUSD 2.70Buy NowClass Benefit III
Class Benefit IIIUSD 2.66Buy NowErica's Agathion Key
Erica's Agathion KeyUSD 2.70Buy NowFull Month Benefit II
Full Month Benefit IIUSD 2.70Buy NowIvory Tower Agathion Key
Ivory Tower Agathion KeyUSD 2.70Buy NowLate Summer Seal Soul Crystal Key
Late Summer Seal Soul Crystal KeyUSD 2.70Buy NowLate Summer Soul Crystal Class Key
Late Summer Soul Crystal Class KeyUSD 2.70Buy NowLeah Autumn Soul Key
Leah Autumn Soul KeyUSD 2.70Buy NowDaily Agathion Pack II
Daily Agathion Pack IIUSD 2.66Buy NowDaily Class Pack II
Daily Class Pack IIUSD 2.66Buy NowWeekly Pack II
Weekly Pack IIUSD 2.66Buy Now180th Day Celebration Key II
180th Day Celebration Key IIUSD 2.70Buy NowWelcome Agathion Key
Welcome Agathion KeyUSD 2.70Buy Now400 Diamonds
400 DiamondsUSD 5.32Buy NowAgathion Token Blessing
Agathion Token BlessingUSD 6.75Buy NowBracelet of Holy Protection Pack I
Bracelet of Holy Protection Pack IUSD 6.75Buy NowBracelet of Influence Pack I
Bracelet of Influence Pack IUSD 6.75Buy NowClass Token Blessing
Class Token BlessingUSD 6.75Buy NowCrystalloid Weekly Pack I
Crystalloid Weekly Pack IUSD 6.64Buy NowCrystalloid Weekly Pack II
Crystalloid Weekly Pack IIUSD 6.64Buy NowDaily Blessing Pack I
Daily Blessing Pack IUSD 6.64Buy NowFancy Awaken Blessing
Fancy Awaken BlessingUSD 6.75Buy NowFancy Spirit Blessing
Fancy Spirit BlessingUSD 6.75Buy NowWeekly Pack I
Weekly Pack IUSD 6.64Buy NowWeekend Blessing Pack
Weekend Blessing PackUSD 6.75Buy NowAgathion Pack I
Agathion Pack IUSD 10.13Buy NowClass Pack I
Class Pack IUSD 10.13Buy Now1000 Diamonds
1000 DiamondsUSD 13.28Buy NowB1G1 Fancy Agathion Card
B1G1 Fancy Agathion CardUSD 13.49Buy NowB1G1 Fancy Class Card
B1G1 Fancy Class CardUSD 13.49Buy NowFancy Unique Craft Blessing
Fancy Unique Craft BlessingUSD 13.49Buy Now1200 Diamonds
1200 DiamondsUSD 15.94Buy NowAgathion Pack II
Agathion Pack IIUSD 20.24Buy NowClass Pack II
Class Pack IIUSD 20.24Buy NowFancy Card Pack
Fancy Card PackUSD 20.24Buy NowSoul Crystal Super Benefit
Soul Crystal Super BenefitUSD 20.24Buy NowVeroa Weekend Pack
Veroa Weekend PackUSD 20.24Buy Now2000 Diamonds
2000 DiamondsUSD 26.56Buy NowGrowth Support Agathion Pack
Growth Support Agathion PackUSD 26.97Buy NowGrowth Support Class Pack
Growth Support Class PackUSD 26.97Buy NowEpic Agathion Chance Pack
Epic Agathion Chance PackUSD 33.20Buy NowEpic Class Chance Pack
Epic Class Chance PackUSD 34.01Buy Now4000 Diamonds
4000 DiamondsUSD 53.11Buy NowBracelet of Holy Protection Blessing
Bracelet of Holy Protection BlessingUSD 66.38Buy NowBracelet of Holy Protection Pack II
Bracelet of Holy Protection Pack IIUSD 67.43Buy NowBracelet of Influence Blessing
Bracelet of Influence BlessingUSD 66.38Buy NowBracelet of Influence Pack II
Bracelet of Influence Pack IIUSD 67.43Buy NowDaily Blessing Pack II
Daily Blessing Pack IIUSD 66.38Buy NowEva's Seal Blessing
Eva's Seal BlessingUSD 66.38Buy NowAgathion Blessing Pack
Agathion Blessing PackUSD 99.58Buy NowAgathion Superb Weekend Pack
Agathion Superb Weekend PackUSD 101.15Buy NowClass Blessing Pack
Class Blessing PackUSD 99.58Buy NowClass Superb Weekend Pack
Class Superb Weekend PackUSD 101.15Buy NowMon-Tues Blessing Pack
Mon-Tues Blessing PackUSD 101.15Buy NowSoul Blessing Pack
Soul Blessing PackUSD 99.58Buy NowSuperb Fancy Agathion Summon II
Superb Fancy Agathion Summon IIUSD 101.15Buy NowSuperb Fancy Class Summon II
Superb Fancy Class Summon IIUSD 101.15Buy Now10000 Diamonds
10000 DiamondsUSD 132.78Buy NowOracle Token Blessing
Oracle Token BlessingUSD 168.58Buy NowAgathion Blessing Superb Pack
Agathion Blessing Superb PackUSD 204.04Buy NowClass Blessing Superb Pack
Class Blessing Superb PackUSD 199.15Buy NowSoul Blessing Superb Pack
Soul Blessing Superb PackUSD 199.15Buy NowSuperb Fancy Agathion Summon
Superb Fancy Agathion SummonUSD 202.29Buy NowSuperb Fancy Class Summon
Superb Fancy Class SummonUSD 202.29Buy Now20000 Diamonds
20000 DiamondsUSD 265.55Buy Now
Dungeon vs Open-World Zone Tier List for Currency Generation
Match your hunting ground to your gear. Pushing above your combat power slows clear speed and wastes potions.
The following table outlines the core farming zones, their level brackets, recommended combat power, and expected loot characteristics.
| Hunting Zone | Target Level & Recommended Power | Primary Farming Yield & Profile |
|---|---|---|
| Gludio Dungeon | Lvl 30-40 (Power 20k-30k) | Low-threat zone ideal for solo farming green/blue gear and basic scrolls |
| Abandoned Camp | Lvl 40-50 (Power 30k-40k) | Balanced EXP and Adena farming with minimal potion consumption |
| Cruma Tower | Lvl 50-60 (Power 45k-60k) | High mob density grind zone for crafting materials and consistent currency |
| Dragon Valley | Lvl 60-70 (Power 65k-85k) | Top-tier Adena farming route with rapid mob respawns and rare drops |
| Tower of Insolence | Lvl 70-80+ (Power 80k+) | Endgame vertical farming offering exponential Adena yield and purple gear |
Takeaway: Match your character strictly to the power bracket where you can 2-shot or 3-shot targets rather than pushing into red-named danger zones.
The Step-by-Step Daily Dungeon and Field Rotation
Run daily dungeons first to cash in on timed multipliers, then shift to low-cost open-world spots.
-
Clear Your Timed Dungeons First (Priority 1: Gludio or Cruma Tower)
Spend your allotted daily dungeon tickets immediately at server reset. If your power is between 45k and 60k, your daily dungeon farm priority belongs inside Cruma Tower. The packed mob density ensures maximum kills per minute while your timed buffs remain active. -
Transition to High-Density Midgame Zones (Priority 2: Abandoned Camp)
Once dungeon timers expire, move to Abandoned Camp if you are level 40 to 50 with 30,000 to 40,000 power. This area balances incoming damage against steady currency drops and armor scrolls. You will generate steady raw gold while maintaining zero to near-zero potion usage. -
Step Up to Dragon Valley During Active Play (Priority 3: Lvl 60-70)
For characters between 65,000 and 85,000 power, Dragon Valley is the premier dedicated Adena farming zone in the game. The rapid monster respawn timers mean zero downtime between packs. Monitor your health periodically here, as elite spawns can occasionally hit hard. -
Overnight AFK Grinding in Low-Threat Open World (Priority 4: Orc Barracks)
Before stepping away from your screen, park your character in an area with high monster density and low damage output, such as Orc Barracks. Packing into low-threat clusters guarantees you do not wake up to a death screen.
When your inventory runs dry during extended dungeon runs, check the Lineage2M packages on xptopup to keep your grinding cycles moving smoothly without falling behind on daily dungeon tickets.

Lineage2M Cruma Tower Farming Route and Floor Breakdown
Cruma Tower remains the gold standard for midgame progression. The sheer monster density on floors 1F and 2F allows classes with wide attacks or rapid targeting to chain kills continuously.
Understanding how your class mechanics interact with monster density helps determine your net profits. The table below compares class archetypes and their sustainability profiles inside Cruma Tower and mid-tier dungeons.
| Class Archetype | Clear Speed Index | Potion Drain Rate | Net Profit Viability |
|---|---|---|---|
| Orb (Auto-Heal Active) | Moderate | Zero (0/hr) | Extremely High (pure profit margin) |
| Dwarf Dual Sword | High | Very Low (Self-sustain 2 HP/crit) | High (fast kills, minimal restocking) |
| Archer / Bow | High | Low to Moderate (Kiting) | Moderate to High (arrows cost Adena) |
| Dagger Rogue | High (Burst) | Very High (Melee chip damage) | Low (heavy potion overhead) |
| Staff / Mage | Very High | Moderate (Mana/HP pot reliance) | Moderate (skill book upkeep required) |
Takeaway: Orb and Dwarf Dual Sword builds generate significantly higher net Adena per hour because they eliminate potion restocking loops entirely.
Inside Cruma Tower 1F and 2F, target mob clusters away from major room entrances where bots and competing players gather. Look for corner alcoves containing 4 to 6 rapid-respawn mechanical and insectoid mobs. Setting your combat boundary to 20 meters prevents your character from wandering into high-traffic corridors where other players contest your targets.
This zone also doubles as a vital Lineage2M material farming route in 2026. Cruma Tower drops essential raw materials used to craft blue-grade gear and upgrade components. Salvaging excess equipment yields Crystalloids, which you must funnel straight into your Spirit Inscriptions. Upgrading Spirit Inscriptions permanently boosts your Soulshot damage and accuracy, directly reducing the total hits needed to kill subsequent mobs.
Optimizing Clear Speed Over Raw Monster Level
Raw kill count beats individual monster yields every single time.
Consider the operational math between grinding low-threat areas versus elite territories:
| Farming Zone | Mob Level Range | Average Adena Per Kill | Kills Per Hour | Gross Yield / Extra Drops |
|---|---|---|---|---|
| Orc Barracks (Early Zone) | Lvl 25-35 | 50 - 100 Adena | 200+ mobs/hr | ~20k Adena/hr + steady scrap |
| Antharas Lair | Lvl 40+ (Elite) | 200 - 300 Adena | 80-120 mobs/hr | ~25k-35k Adena/hr + 5k+ scrolls |
| Abandoned Camp | Lvl 40-50 | 120 - 180 Adena | 180-220 mobs/hr | ~30k-40k Adena/hr + Armor Scrolls |
Takeaway: Grinding fast-dying packs in Abandoned Camp or Orc Barracks yields comparable or better net currency than struggling against elite mobs in Antharas Lair, while saving thousands on potions.
In Orc Barracks, monsters drop modest amounts of 50 to 100 Adena per kill. Because they die in two basic attacks, you easily eliminate over 200 mobs per hour for a consistent 20,000 Adena baseline with zero consumables burned. Antharas Lair offers 200 to 300 base Adena per elite mob along with valuable sellable scrolls worth 5,000+ Adena each. If your combat power is below the threshold, the damage taken in Antharas Lair will burn through more currency in potions than the scrolls provide.
There is a notable discrepancy in territory maps: early-game guides categorize Orc Barracks as a level 25-35 hunting ground in Gludio, whereas high-end map overviews refer to an endgame level 80+ Orc Barracks variant in Aden territory. Make sure you are deploying to the correct region for your character's combat power.
Soulshot activation depends strictly on your kill thresholds. If activating Soulshots drops your hits-to-kill from 4 hits down to 2 hits, the doubled clear speed compensates for the Soulshot cost. If activating Soulshots only shaves off one hit from an 8-hit kill against tanky enemies, Soulshots will rapidly drain your wallet. Turn Soulshots off when farming weak open-world clusters.
Crucial Auto-Combat Settings and Tracking Your Hourly Net Profit
Auto-battle configurations dictate whether your overnight grind turns a profit or leaves you broke in town.
HP Potion Activation Threshold
Set your auto-combat HP potion recovery threshold strictly between 60% and 70%. Setting this slider to 85% or 90% causes your character to spam expensive potions over minor chip damage that natural regeneration or Orb healing could easily handle. Setting it below 50% exposes you to sudden burst deaths from elite spawns.
Skill Auto-Cast Management
Disable auto-casting on high-mana, low-damage active abilities. If your mana pool runs dry, your character stops casting primary sustain spells like Heal. Keep your auto-rotation limited to low-cost spammable skills and basic attacks to preserve mana regeneration.
Measuring Real-Time Efficiency with Power Save Mode
Do not guess your farming numbers. Enable Lineage2M's built-in Power Save Mode and click the battery tracker icon. This screen displays your live metrics: * Raw Adena earned per hour * EXP gained per hour * Consumable and potion drain rate per hour
If your tracker shows your potion count declining by more than 50 potions an hour in a standard zone, that farming spot is inefficient. Relocate to a lower-level mob cluster immediately.
Utilizing the Level 45 Respec Milestone
Reaching level 45 grants every player a free Status Reset Scroll. Early leveling builds often scatter stat points across secondary attributes. At level 45, use your Status Reset Scroll to reallocate all points directly into your primary damage and sustain stats (such as INT for Orb users or STR/DEX for physical hitters) to maximize clear speed.
Players scaling into high-tier dungeons often utilize xptopup Lineage2M resources to maintain their supply lines and skill book upgrades during these crucial midgame transitions.
Managing Multi-Account Transfers and Mail Caps
Running secondary farming accounts is a proven method for feeding materials and currency to a primary character, but it comes with strict system limitations.
Lineage2M imposes a hard cap on direct mail currency transfers. Daily Adena transfers via mail between accounts have a maximum ceiling of 50,000 Adena per day per transfer.
Because of this 50k daily limit, relying solely on raw currency mailing to fund your main account is slow. Instead, use your alt characters to farm tradable crafting materials, enhancement scrolls, and Crystalloids. Transfer these tradable items or list them through the trade board to generate indirect value rather than waiting on the 50k daily mail timer.
FAQ
What is the best solo class setup to avoid burning Adena on potions?
Switching to an Orb class with auto-cast Heal provides maximum sustain without purchasing potions. Dwarf Dual Sword users also gain reliable self-sustain via 2 HP recovery on every critical strike.
Which dungeon route offers the highest Adena yield for mid-level solo players?
Abandoned Camp (levels 40-50) and Dragon Valley (levels 60-70) provide the best Adena drop density relative to incoming damage. Cruma Tower serves as the premier intermediate zone between levels 50 and 60.
How can I check if my current farming route is cost-effective?
Enable Power Save Mode in your settings and click the battery tracker icon. This displays your real-time Adena, EXP, and potion consumption rates per hour so you can calculate your net margin.
Should I farm mobs above or below my character level for optimal Adena?
Farm dense mob packs slightly below your level that die in two to three hits. Faster clear speed consistently yields more net Adena per hour than sluggish fights against high-defense enemies.
What auto-battle settings help minimize Adena waste?
Set HP potion recovery to trigger between 60% and 70% to avoid wasting potions on chip damage. Ensure high-cost active skills and soulshot usage are turned off when grinding low-threat mobs.
How do Spirit Inscriptions help my Adena efficiency?
Spirit Inscriptions permanently enhance your damage and accuracy when consuming Soulshots. Leveling them with Crystalloids gathered from drops and salvaging reduces the total hits required per kill, conserving your resources.
Final Verdict on Solo Adena Sustainability
Maintaining a massive Adena surplus in Lineage2M is not about grinding the hardest monsters available; it is about maximizing your clear speed while eliminating unnecessary consumable drains.
Run an Orb or Dwarf Dual Sword character for extended solo auto-grinding. Focus your daily dungeon priority on Cruma Tower 1F/2F, spend your active hours clearing rapid respawns in Dragon Valley, and park your character in Abandoned Camp or Orc Barracks for overnight sessions. Keep your potion threshold locked at 60-70%, track your hourly yields via Power Save Mode, and reinvest your Crystalloids into Spirit Inscriptions. Follow this loop consistently, and you will never face an Adena deficit again.





Comments